Vintage. Eclectic. Repurposed.

Good news and a DIY Valentines Day project


Finally! I'm putting pen to paper so to speak! I have been out of action for awhile because I finally moved to live on the beautiful Gold Coast. I've been planning this move for a few years now and was waiting for a small unit to become available. Well it finally did! The week before Christmas! Believe me I was in no way ready, Christmas preparations were in full swing, buying presents and food and diying Christmas ornaments was what was on my mind. When I received the phone call telling me about the unit I had to go and look at it. When I first saw it I fell in love with it's surroundings. The back door leads to a meandering creek which travels to the Nerang River only a few kilometres away.There is a resident  bush turkey, a large lizard  and other fauna that I've spied so far. Being surrounded by nature and being near the beach were 2 of my priorities so it was perfect. Having internal brick walls was what I loved in the interior, but it was small. I call it my "tiny unit"! One of the other main reasons for moving was downsizing, I was finding it difficult to maintain a house and garden on my own. Here I have the best of both worlds. I'm surrounded by beautiful gardens and bush but I don't have to look after them. At my age that is a big bonus. I'm planning on doing some posts on redecorating and minor renovations to my little home. I can't wait to share them with you.

Now I'll get into my Valentines Day decorations, it's only two weeks away! Time is going too fast, I want to get off the merry-go-round and slow things down, but of course that's not possible so I'd best get on with it. I'm using things that I already had so this project cost next to nothing.

I started off with a heart shaped piece of cardboard that I cut from an old box, so no money spent there. I cut out the covering for the heart from an old gift bag so again nil dollars. I love projects like that, no cost and using something that would probably have ended up as landfill. This is what I used for the project:

1. Cardboard
2. Old gift bag
3. 2 different coloured ribbons
4. Lace
5. Glue
6. Stick on Pearls and pearl string


I did the same with the ribbon and the pearls. The pearls have a flat bottom with glue on them but I added a dab of glue to each one as well as they tend to come off too easily. Next I used my hole puncher at the top so I could thread the pearl string through. I already had the board and stuck a drawing pin in to hang my heart from.


Well that's it! You can use this decoration to hang on a door, a wall or use it as a card, writing your message on the back. If you're on a tight budget this would be perfect. I hope you all have a wonderful Valentines Day however you choose to decorate. I'd love to hear your thoughts so please feel free to comment, till next time. Please  come and see Where I Party for more inspiration

How to make quick Christmas gift tags and tree ornaments

Here I am again with another of my favourite recycle and repurposes. You know I hate waste and this post helps to deal with that. I know it's only in a small way, not on any grand scale whatsoever but I believe every little bit adds up to a big bit! So there's my philosophy for the day! Very indepth I know!

I've been doing some shopping looking at prices for Christmas cards decorations etc. and though it looks inexpensive I started adding up the prices of those little bits and pieces and it was more than I thought. My brain was on overdrive so I looked through my stash of recycled  odds and ends and decided to start with Christmas gift tags and Christmas tree ornaments. Here is a list of what I used:

. Old cards
. Cardboard from grocery boxes
. Scraps of fabric and felt
. Old bits of jewellery
. Ribbon
. Twine
. Tin can and bottle lids
. Buttons
. Hole puncher
. Glue (I used cement glue) or a hot glue gun


They were so simple to make and you can have your kids or grandkids help. It makes a great crafting morning.


Firstly I cut out a card from the cardboard and used it as a basic template. I changed a few details, cutting the edges diagonally but that was it. After I'd cut out all of my gift tags it was time to start decorating. I used my hole puncher to cut out a circle for the ribbon to go through. Then I added the decorations, and that was fun! I could have made more, it was so addictive!
For the tree decorations I used a lid from a tin can and a lid from a glass jar. I covered these in felt by tracing around the lid onto the felt then covering it front and back with glue. I used an old earring on the red and white ornament because I always lose one of my earrings and end up with one, so that little red earring was perfect! I'm so glad I decided to keep the odd ones and not throw them out. I think it added a glamorous touch to it. 


The green, red and white one above is covered in green felt and a piece cut from an old gift bag with a pearl sitting in the middle.


I thought these would be great for my granddaughter and grandson. I used buttons and scrap felt.


I had so much fun making these, my granddaughter wants to make them as well so we are setting up a date for school holidays next week. If you have cardboard boxes,which you can find in the pantry, tea, cereal etc, some bits of ribbon or twine, you can make them too. You can draw or paint designs, use stamps made from a cut potato or celery, old wrapping paper, old buttons, bits of broken jewellery, you're only limited by your imagination! 

Have a great week everyone, I have some more ideas brewing for my next post so till then stay safe and happy     

A White and gold Christmas wreath

Well Christmas is getting closer and closer and me being me leave my decorating and shopping to the last moment. It will be summer here in the southern hemisphere, hot and humid, so we'll be having Christmas day at the home of one of my daughters on the Gold Coast. We usually eat outside over a long and leisurely meal and afterwards go for a swim in the pool. So very different to celebrating Christmas in the cold weather as you do in the northern hemisphere.  

Now it's time I started to think about Christmas decorating. I won't be doing anything grand and certainly not expensive. Christmas is costly enough and I want it to be all about being together as a family, sharing lots of love and laughter, not on how things must "look". I love the time we spend together making new memories and traditions, they can never be replaced.   

I wanted to make my Christmas decor from what I already have instead of buying more. It's sad that so many people go into debt for Christmas and have to pay it off during the following year, which  takes the joy out of Christmas giving and places unnecessary stress on families. I don't want to put myself or any of my loved ones into that position. Looking through my supplies I decided to make a white and gold Christmas wreath for my front door . I wanted to put a bit of glitz and  glamour into it and I thought white and gold perfect for this. Simple but stylish.

These are the materials needed for this project:

.  Styrofoam wreath ring
. White ribbon
. Ribbon to hang wreath
.  Pearls
. White and gold twine
.  Glue
. Large gold key or similar


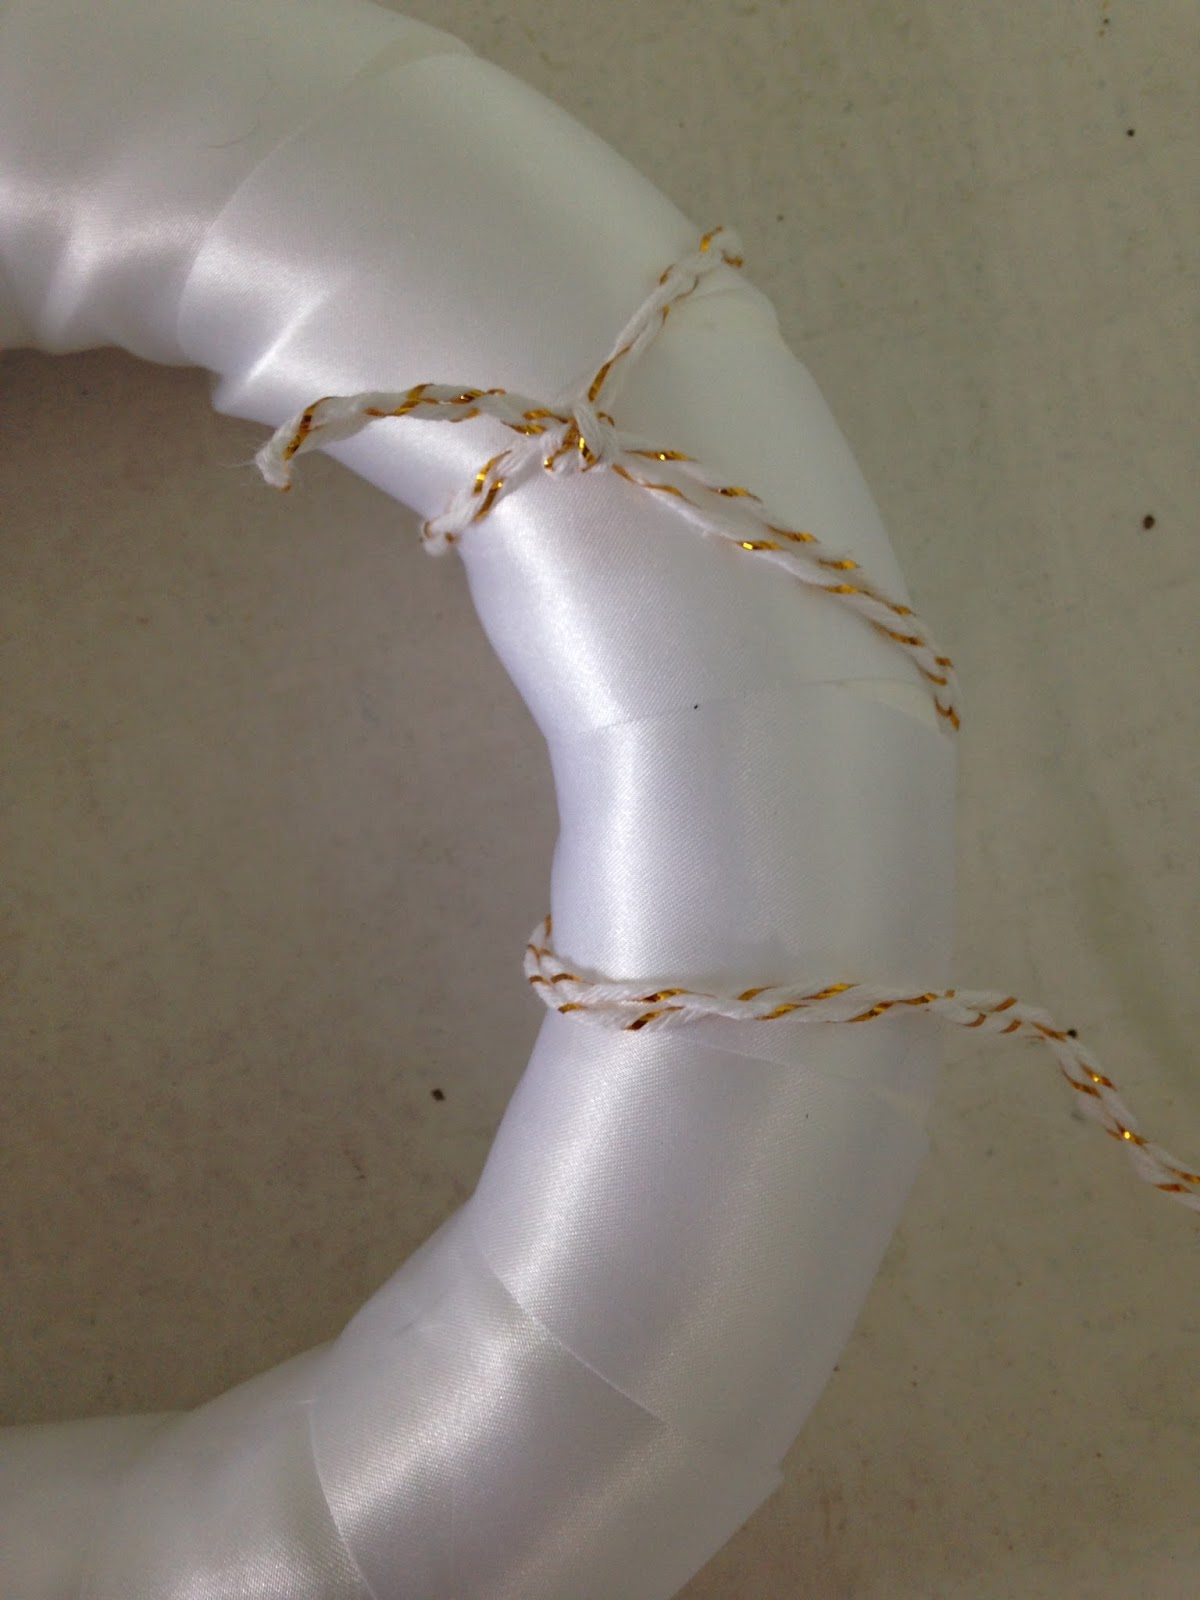
The first step is to start winding the ribbon around the wreath


I put a dob of glue onto the start of the ribbon and stuck it to the wreath to make it easier to wind around it and put another dob of glue at the very end. Once I'd finished winding all the ribbon around the wreath I started to wind the white and gold twine around it.


Once that was finished I applied the pearls with glue. I used a cement glue but a hot glue gun could also be used. As long it holds the pearls on. I placed them on randomly but you could put them all over and add more if you prefer. Next I tied the big gold key on with the white and gold twine. Lastly I tied a piece of cream coloured ribbon around the top of the wreath so I could hang it on my front door or as you see in the picture on the wall as part of a gallery.


There are so many ways you could make this, only limited by your imagination. I hope it's given you a bit of inspiration to try and make your own decorations, and get the kids or grandkids to join in. It's always so much fun and they love to say they helped make it! Let me know in the comments what you think. I love getting feedback and enjoy hearing from you


Fall Decorations, Three easy projects

I've been looking at Pinterest and Instagram and seeing all the beautiful fall decorations. The thing is where I live it is spring! I haven't seen any spring decor only autumn or fall as some call it.
I decided to join the throng and make my own fall decor. I suppose the way the weather has been worldwide, heat waves in autumn, hot winters in Oz, floods and fires, anything goes!

I don't have any pumpkins, real or fake, we don't decorate for our seasons as much as our northern counterparts, so I'm using colourful autumn leaves to decorate. I must admit I love the velvet pumpkins. I went to a fabric shop to buy some velvet for another project and because of our hot climate they don't stock velvet! I was not impressed to say the least! I will probably order some online.

I have three quick and easy fall decorations to share that I made using these leaves. These are the supplies you will need to make them:


Finished wreath


               For Wreath

A Packet of fall leaves from the $2 shop
Hessian (burlap) roll
Twine
Hot glue gun or similar
Scissors  


               For Branches with fall leaves

Branches. I got mine from a tree in my backyard
Leaves (as above)
Glue or hot glue gun 

               For Welcome Sign

A piece of scrap wood
Leaves (as above)
Glue
Stenciled or stick on letters
Roll of hessian ribbon or wire
White homemade chalk paint


For the wreath I started with an old plastic covered wire coat hanger bent to the shape that I wanted. I used the hessian roll to wind around the coat hanger


Plastic covered wire coat hanger

Starting to roll hessian (burlap) onto hanger
I had already made a garland with twine and I glued the leaves onto the twine as shown 


Leaf garland
I then wrapped this garland around the wreath but you can simply glue the leaves straight onto the hessian wrapped coat hanger. 

As you can see above these are the branches I cut from a tree in my backyard and using the same leaves I glued them onto the branch where I wanted them.


Branches with glued on leaves

 The welcome sign was made using a scrap piece of wood to which I gave a very light coat of white chalk paint. I then wrapped a 2" piece of hessian (burlap) around one end and glued the leaves to it. I had a piece of ribbon left over from another project and I simply nailed it onto the back of the timber. I nailed it a part of the way through and bent the last bit of the nail over with the hammer. I did this because I didn't want it to come all the way through the piece of wood and hammered it over so it wouldn't stick out.


Welcome sign


Sorry this picture is sideways and I know a few of the letters are wonky but I quite like it like that.

I hope you enjoyed the fall decorations, I had fun doing them and they were really easy to do. If you make any I would love to see them. Have a great day  

Hanging mobile for babies or adults


Hi everyone! I haven't posted in awhile because I caught that nasty flu that was hitting everyone and then Bronchitis. I still feel unwell but I'm getting there. I'm going to do something a bit different today, something I've been thinking about for awhile. I have had an old lampshade frame kicking around and decided it was time I did something about it. 


I'm going to show you how I made this mobile from bits and pieces I had in my fabric stash. It's a hanging mobile and it can be made for babies and adults too. It has a sort of boho shabby style to it! It's not hard, I'm sure anyone could do it. If I can, you can, believe me! 

Supplies:
. Lampshade frame
. Strips of fabric
. Ribbons
. Strips of lace
. Glue
. Faux flowers
. Pearls
. Raffia or similar to hang chandelier

1. Firstly I cut the strips of fabric 2" in width. I started tying the strips of lace, fabric etc around the base of the frame. I tied them the same way as you tie a tie! I did mine in staggered lengths but you can have them all the same length if you desire.
As you can see in this following picture I took some of the strips of calico and folded them over the top. I pinned them first to keep them in place and then I glued them around the top of the frame


Lampshade frame


Frame with strips of fabric, ribbon and lace


As you can see I've used strips of calico, strips of an old sheer curtain that I had and a couple of different ribbons for variety. I took pieces of the calico and pinned them to the top of the frame


I was designing this as I went because I hadn't made a mobile before and had so many ideas running around in my head. 
I was trying to decide what I could use to put around the base and the top of the frame. Finally I found this burlap type ribbon in my stash and glued it around the bottom of the frame. I was thinking of stitching it on but I glued it first with fabric glue and thought I would see how well it held. Being a mobile for my grandaughter it wouldn't be played with so I think it will be ok.


Here it is with the ribbon and flowers added but I wanted to add a bit of something to the top of the frame as well. I love pearls with burlap and calico and I happened to have a half inch wide pearls on a band which was perfect


Well, here is the finished product. What do you think of my hanging mobile? Would you make it for a baby or adult? Thankfully my grandaughter loved it and so did Mum! I've had a request from another daughter for a boys mobile for my youngest grandchild. She wants the colours electric? blue, teal and mint green. I think she means a cobalt blue which is one of my favourite blues. I've seen it called a few different names but to me it's cobalt blue!

I hope this has inspired you to create your own hanging mobile for your own grandchildren or even as a gift to an adult, someone special. I think many people appreciate something that is hand made where a lot of heart and soul has been put into it. It has more meaning.

Enjoy your week everyone and keep safe.
Blogger Template Created by pipdig